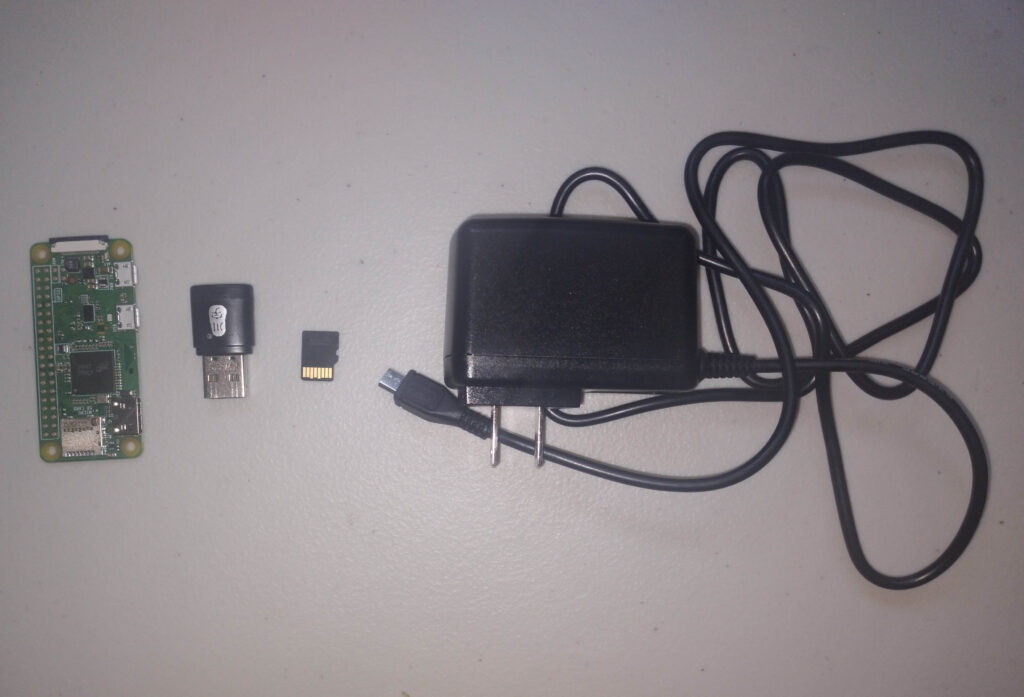
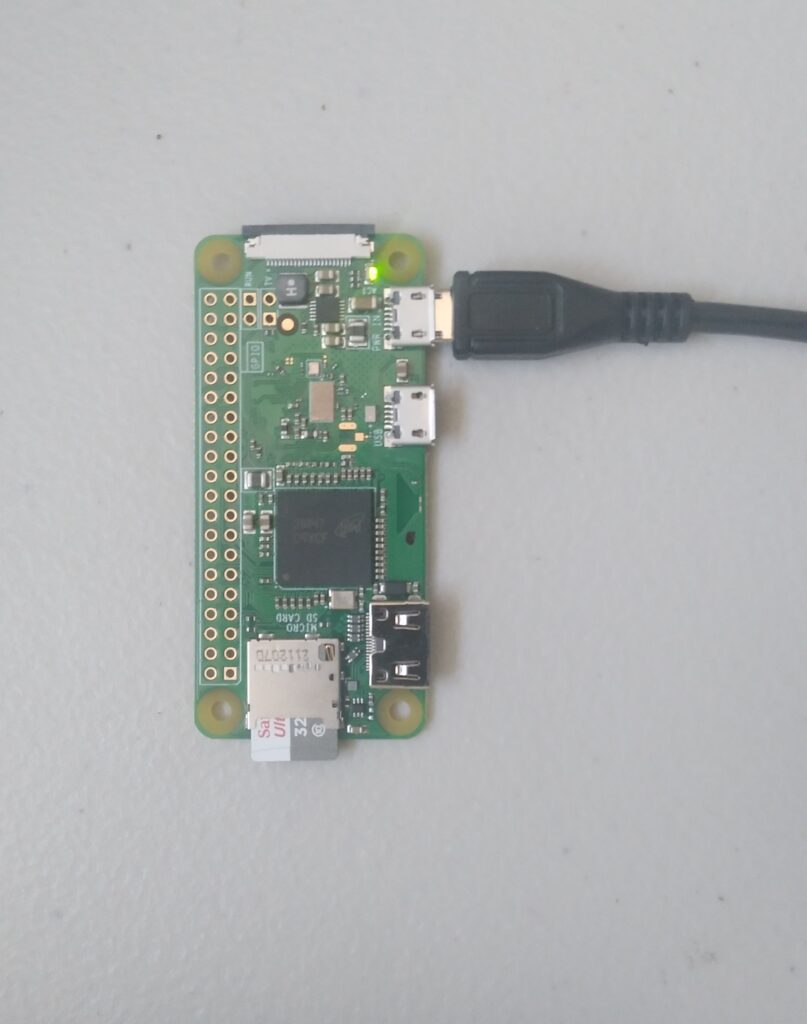
Setting up a Raspberry Pi Zero W board is quiet simple. All you need are:
- A Raspberry Pi Zero W board
- MicroSD Card Reader
- SD Card with a minimum of 8GB memory size
- A power supply for the board ( a USB cord will do if you do not have a power supply)
The items listed above are illustrated from left to right in the image below:
You will also need a computer ( I am running mine on a Windows operating system). Now that we are ready, The steps to follow are:
- We plug in our micro SD card reader with our microSD inserted into our computer and wait for it to show up on computer.
- We get the “Raspberry Pi Imager” on the Raspberry Pi website. Check out this link. This app will help us with installing and setting up our operating system for the Raspberry Pi Board on the microSD card.
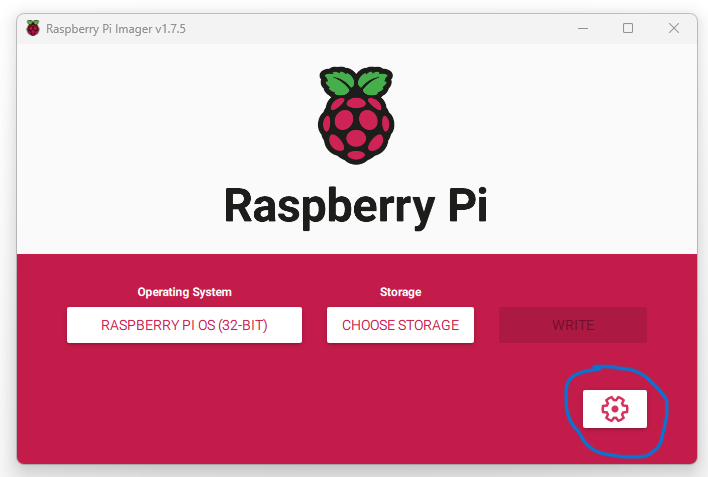
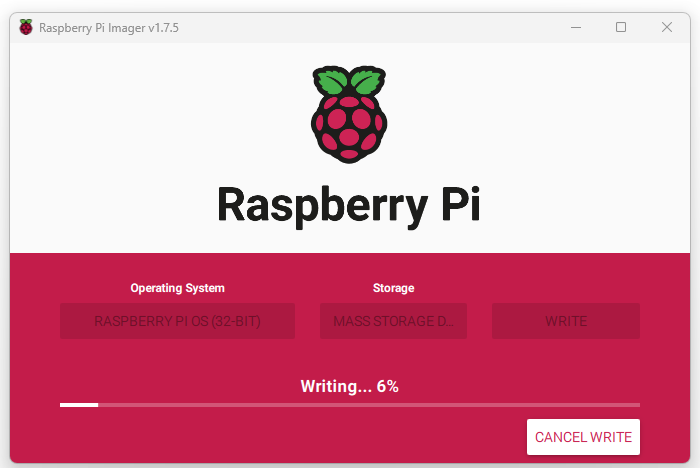
- After installing the “Raspberry Pi Imager”. Run it, you should get the window below. Click on the button in the blue circle.
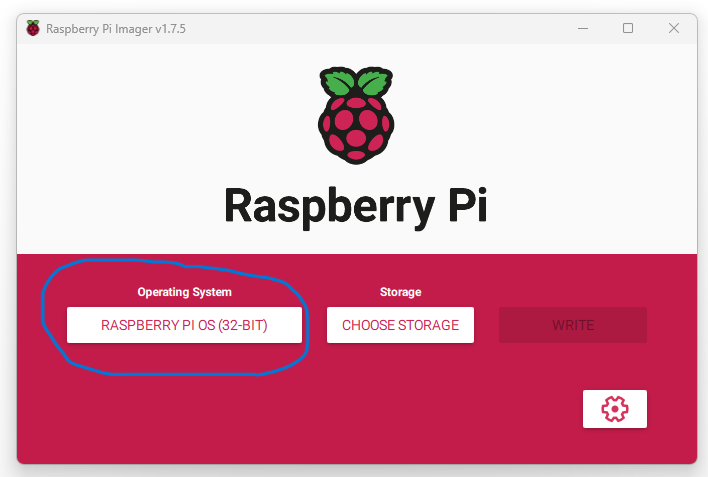
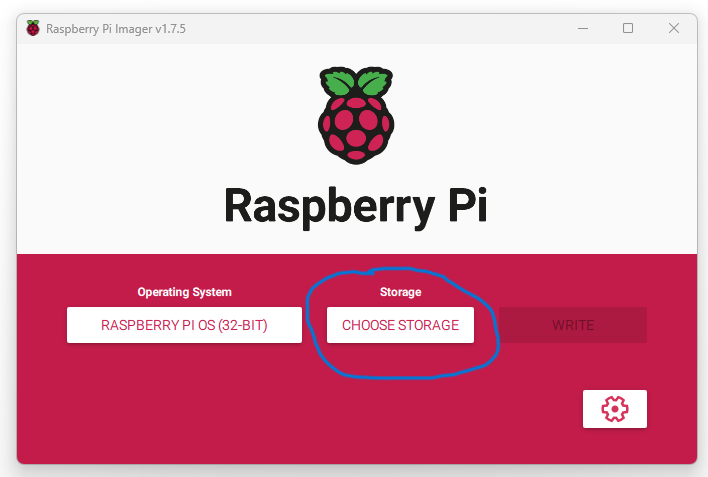
- You will get a window to select the operation system you want to install. Select the “Raspberry Pi OS (32-bit)”. This option gives us a Desktop we will be connecting to later in this tutorial.

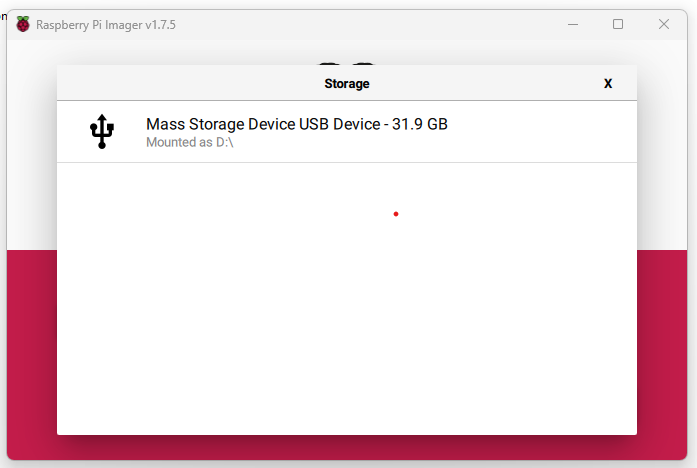
- After selecting your OS of choice, you are taken back to the home screen where you choose the storage device – in this case the MicroSD card you inserted. CAUTION: Ensure the storage you selected is the microSD card you want to use for your Raspberry Pi board.
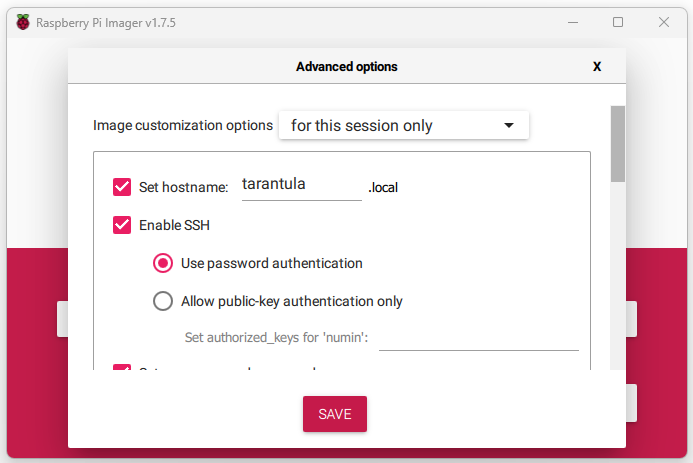
- Before you click ‘write’. Select the Gear icon button at the lower right corner of the window. This is the ‘advanced options’ and this is where you setup the board to connect your network on boot and setup login credentials. Do the following:
- Enable ‘Set hostname’ and enter a name of your choosing.
- Enable SSH, select use ‘password authentication’
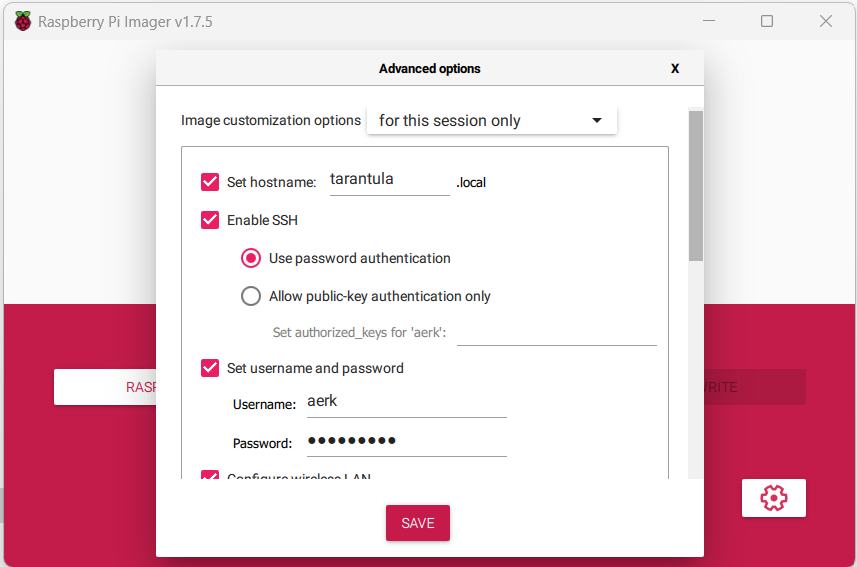
- Enable ‘Set username and password’. Enter values of your choosing. Don’t forget both, note them down, you need them to login.
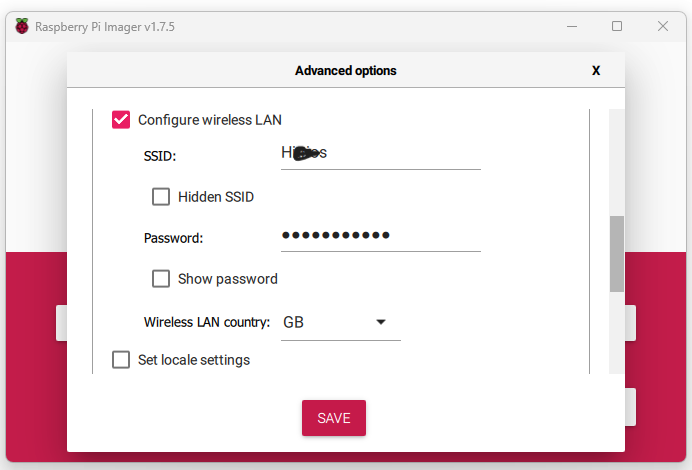
- Enable ‘Configure wireless LAN’. Enter ‘SSID’ which is the name of the WIFI network you want to connect to. Enter the WIFI password. Select ‘Wireless LAN country’ from the dropdown.
- Click Save
- Enable ‘Set hostname’ and enter a name of your choosing.
- Click Write then wait for the app to download and install the OS with the option you added.
- After the installation process. Connect the board to the power supply and wait for it to boot – the green LED indicates the board is booting . Then check your network to ensure you can find a device with the hostname you added in step 6.
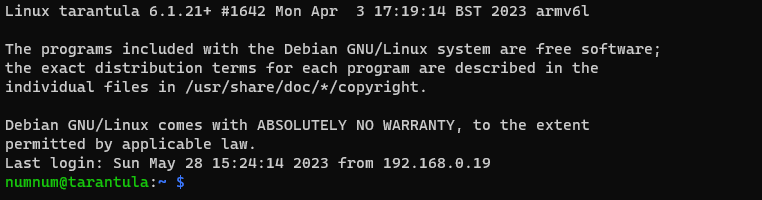
- First ensure your computer is connected to the same network as the board. Open your command line,[ enter
wslif on a windows system,] then type inssh <username>@<hostname>where username and hostname are the ones set in step 6. You are prompted for your password, type it in and press Enter. If all is correct you are logged in as shown below. Notice the change from ‘sheunl@sheunz’ to ‘numnum@tarantula’.

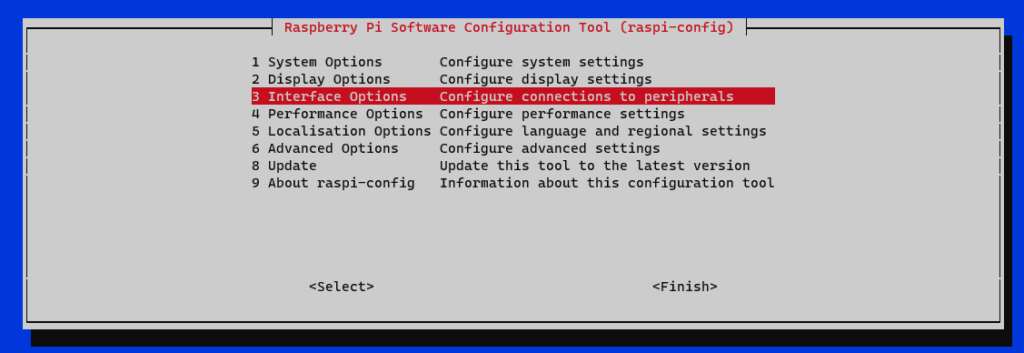
- Now you are connected to the command line for the Raspberry, It time to enable the Remote Desktop feature, run
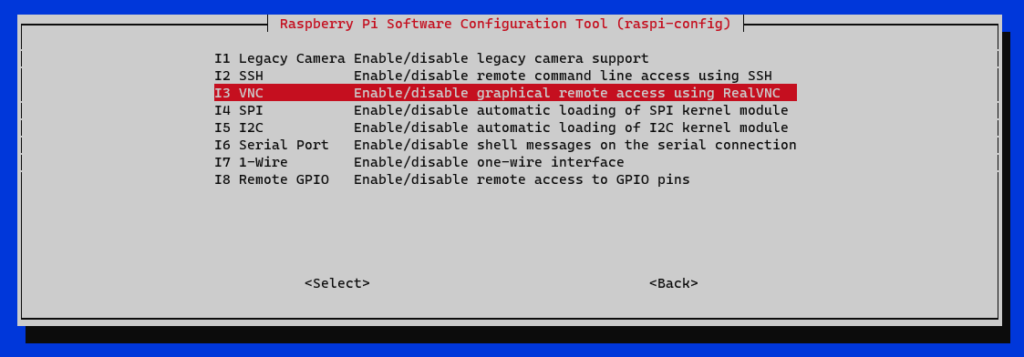
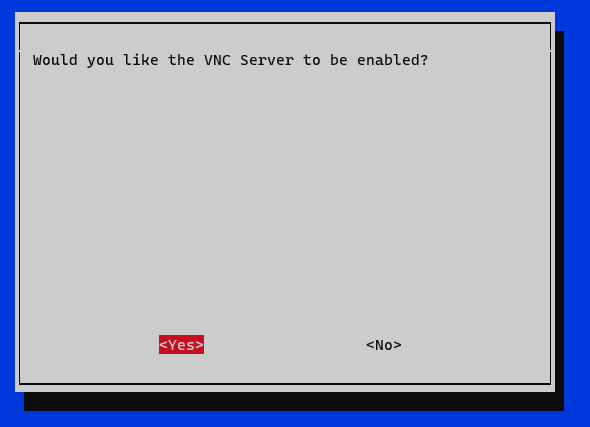
sudo raspi-configyou will get a command line menu for the Raspberry Configuration Tool- Select ‘Interface Options’ using the arrow button then Enter. Then select ‘VNC’. You will get asked ‘Would you like the VNC Server to be enabled?’ press Tab and press Enter on <yes>.
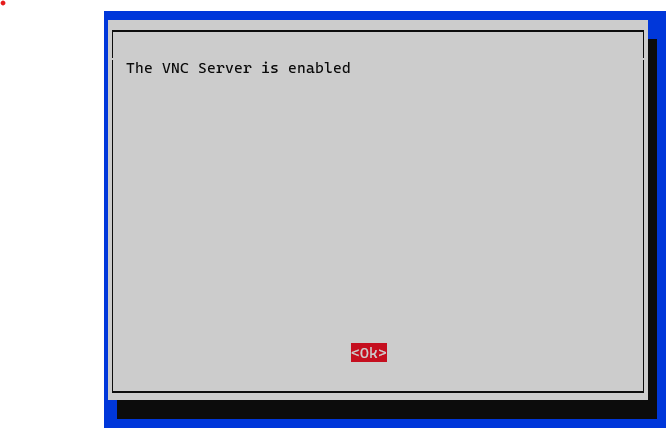
- VNC server gets enabled and your get a box indicating that.
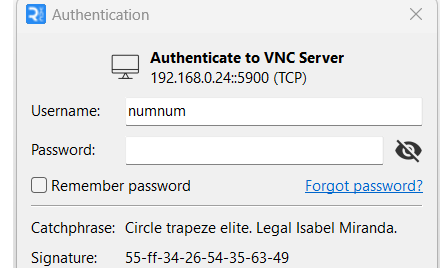
- Download RealVNC viewer.
- Setup the RealVNC viewer and open the app.
- Connect using the hostname you added at step 6. You will be prompted to confirm SSH key fingerprint, click yes. Then prompted for your SSH username and password. Enter both and click okay.
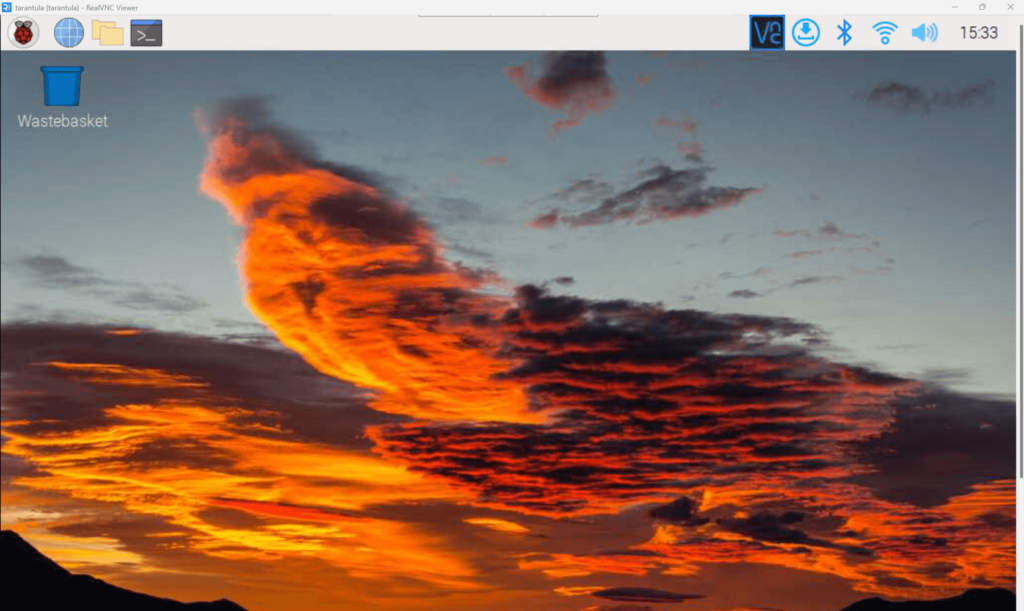
- Your should now see the Raspberry Pi OS Desktop in a new window.
Results should be a window like below.
Finally ! You have set up your Raspberry Pi board, have fun.
Leave a Reply